Scanning Documents
Documents can be scanned only on the → tab.
Scanning documents requires the user to perform a one-time setup process when attempting to scan a document for the first time.
-
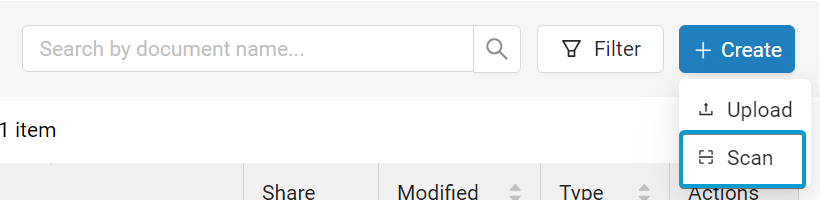
Open Document Manager from → .
-
Click → .
Note
If prompted to complete the one-time setup, click and run the installer package. Otherwise, proceed to Step 3.
-
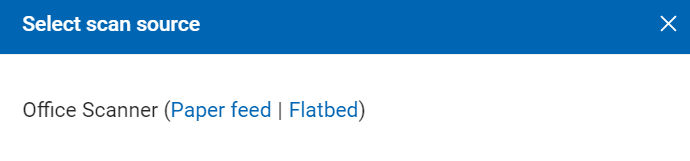
Select your scan source. This is typically a choice between your scanner's automatic document feeder and the glass flatbed.
-
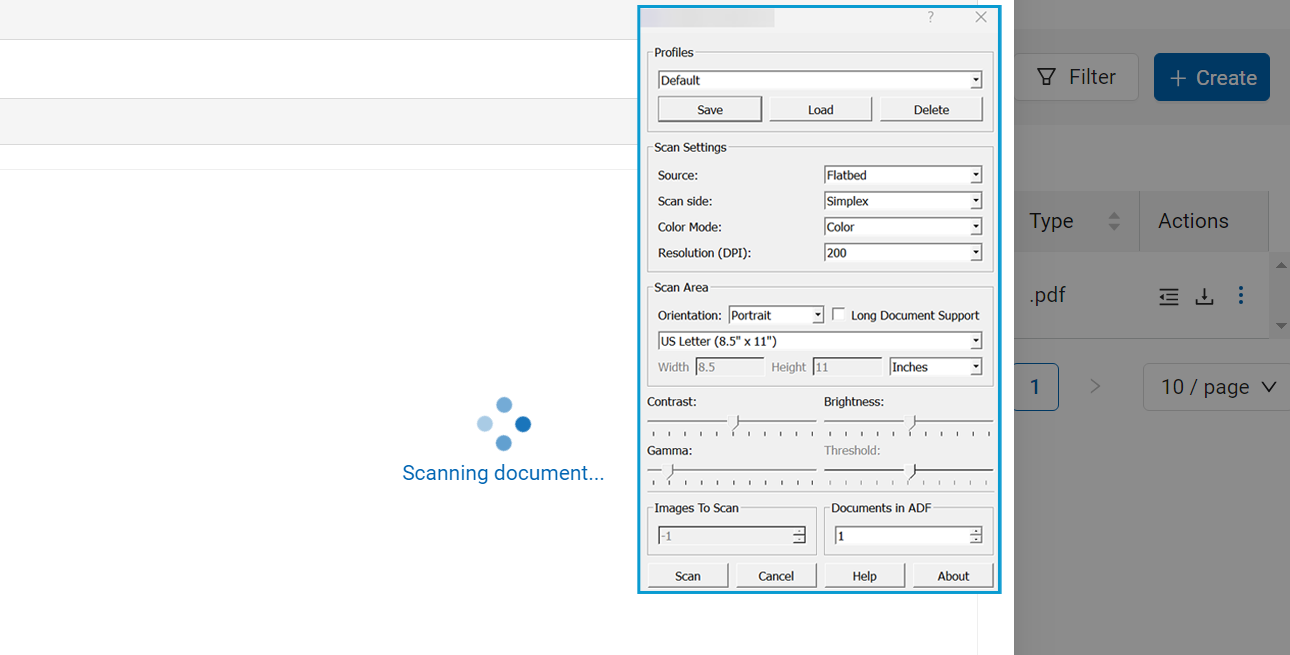
If applicable, follow the onscreen instructions provided by your scanner to finish the scan.
Note
The dialog box that can appear at this stage is provided by your scanner's software/drivers. For more information or troubleshooting at this stage, consult your scanner's documentation or contact your scanner's manufacturer.
-
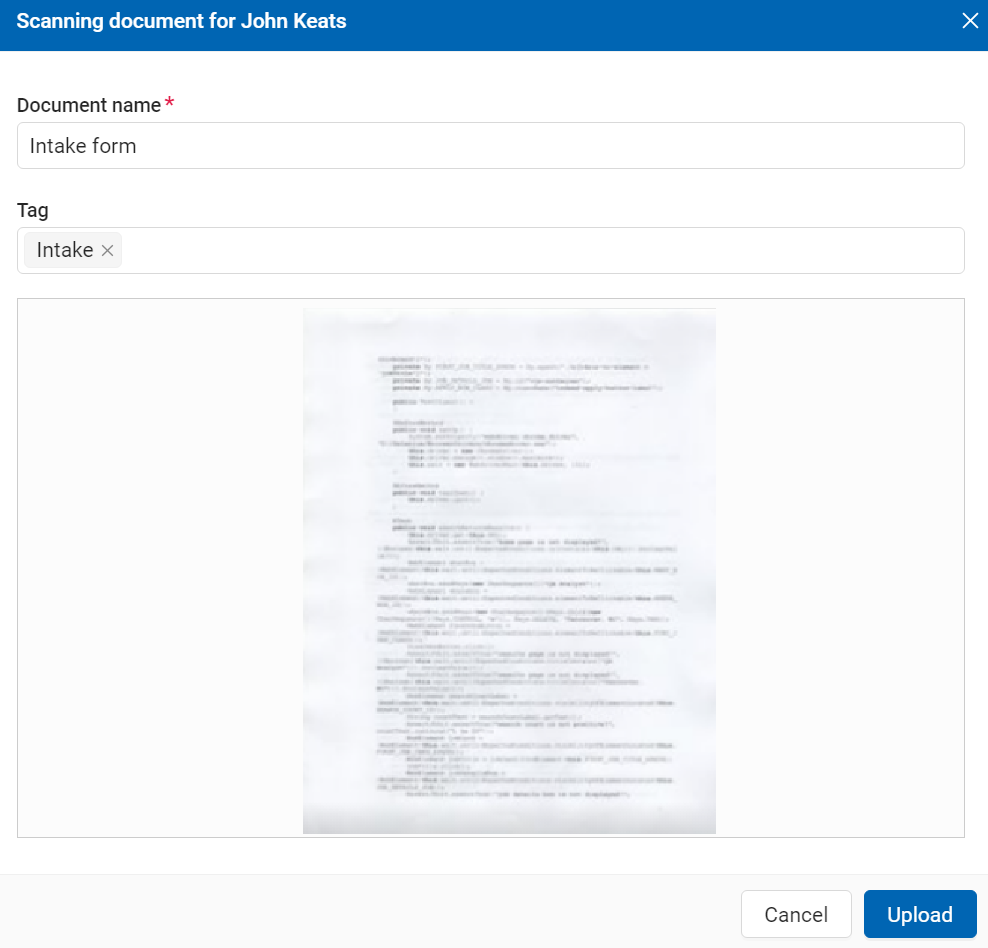
Enter a name in the Document name field.
-
In the Tag field, select one or more tags to add to the document.
Tip
Tags help identify a document's purpose and can be used in filters.
-
Click to finish uploading the scanned document.
If you need to make changes to the uploaded document, refer to Editing Documents.