Funding a Purchase with HealthiPlan®
After a patient's application has been approved (via prescreening or instant credit), that patient's purchases can be funded using HealthiPlan.
-
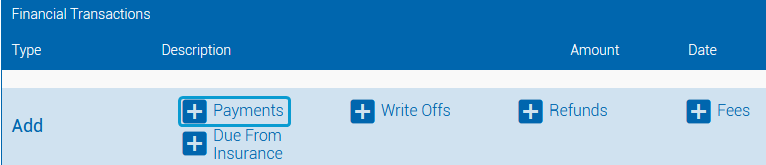
On the Purchase Summary screen, click Payments to open the Add Payment screen.
-
On the Add Payment screen, enter the value of the payment in the Payment Amount field.
Note
You can click the Total Amt button to fill the Payment Amount field with the total outstanding invoice balance.
-
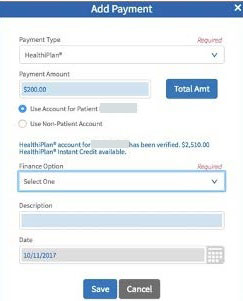
In the Payment Type field, select HealthiPlan® and do one of the following:
-
To use the patient's account for funding, leave the Use Account for Patient [Patient Name] option selected and proceed to Step 4.
Note
If the Use Account for Patient [Patient Name] option is not available, the patient does not have an approved application linked to their patient record.
-
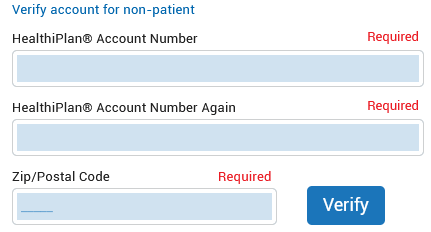
To use an account that is not linked to the patient's record, select Use Non-Patient Account. Complete the fields and click Verify. Proceed to Step 4.
Warning
Account information entered here is not saved to the patient record.
Note
This section is used to apply payment from an account that is not linked to the patient. If the patient has an existing HealthiPlan account that is not linked to their patient record, add the patient's HealthiPlan account information to their record (see Adding and Verifying Existing HealthiPlan® Patients).
-
-
Select one of the fields under Finance Option.
Note
The available finance options may change when the value of the Amount field is adjusted.
-
(Optional) Enter a description in the Description field.
-
If needed, adjust the date in the Date field.
-
Click Save to close the Add Payment screen and return to the Purchase Summary screen.
-
On the Purchase Summary screen, collect any outstanding balance from the patient via other payment types.
-
Click Save. The patient’s available credit will be adjusted to reflect the purchase.
Warning
If you are shown a "Patient's HealthiPlan payment cannot be processed, please reverify patient's account or use another form of payment." error message when saving, click Reverify Account at the top of the Purchase Summary screen and follow the instructions in Reverifying Existing HealthiPlan® Accounts.
-
Click print. This will print the invoice and the HealthiPlan® Sales Receipt.
Important
Print two copies of the HealthiPlan® Sales Receipt. Collect the signature(s) on both copies.
-
Provide one copy to the patient and retain the other copy for your records. This is important for your protection in any disputes.
Editing a HealthiPlan® Payment
A payment can be edited on the same business day the payment was made.
-

On the Purchase Summary screen, click edit on the HealthiPlan payment line to open the Edit Payment screen.
-
Adjust the fields on this screen as needed.
Note
The fields on the Edit Payment screen are identical to those on the Add Payment screen. These fields are defined in detail in Funding a Purchase with HealthiPlan®.
-
Click Update to close the Edit Payment screen and return to the Purchase Summary screen.
-
On the Purchase Summary screen, click Save. The patient’s available credit will be adjusted to reflect the adjusted purchase amount.
-
Click print. This will print the invoice and the HealthiPlan® Sales Receipt.
Important
Print two copies of the HealthiPlan® Sales Receipt. Collect the signature(s) on both copies.
-
Provide one copy to the patient and retain the other copy for your records. This is important for your protection in any disputes.
Voiding a HealthiPlan® Payment
A payment can be voided on the same business day the payment was made. To process a refund for returned equipment, see Refunding a HealthiPlan® Credit Account.
-
On the Purchase Summary screen, click Delete on the HealthiPlan payment line.
The payment is voided, and the patient’s credit balance will be adjusted accordingly.
Refunding a HealthiPlan® Credit Account
HealthiPlan payments can be edited (Editing a HealthiPlan® Payment) or voided (Voiding a HealthiPlan® Payment) on the same day the payment was added. Refunds are not restricted to the same day the payment was added.
The instructions below cover returning equipment and processing a refund to HealthiPlan.
Warning
While you are not restricted from making refunds without making a return, it is best practice to process refunds to third parties only after the equipment on the invoice has been marked as returned. This ensures a clean audit trail.
In a situation where the patient is not returning their equipment (such as changing payment methods when the void option is no longer available), return the items and refund the payments on the initial invoice using the instructions below, then create a new invoice with the items and process the new payment on that invoice.
-
Verify the patient’s HealthiPlan® credit account (see Adding and Verifying Existing HealthiPlan® Patients).
-
Navigate to the appropriate invoice to open the Purchase Summary screen.
-
On the Purchase Summary screen, return the equipment.
Warning
While this step is optional, refunds should be processed only after the equipment on the invoice has been marked as returned. This ensures a clean audit trail.
-
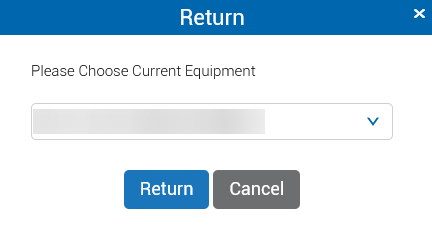
Click return on the equipment line of the invoice to open the Return dialog screen.

-
In the Return dialog screen, verify the items being returned, whether the item(s) should be returned to inventory stock, and the return date.

-
Click Next.
-
If applicable, select the patient's current equipment or leave as "None."
-
Click Return to complete the return and to close the Return dialog screen.
-
-
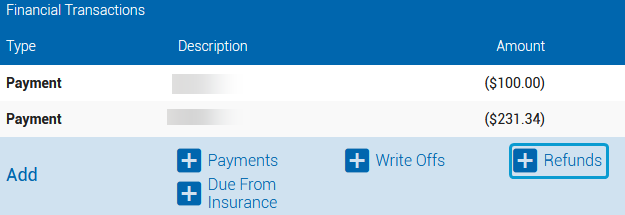
On the Purchase Summary screen, click Refunds to open the Add Refund screen.
-
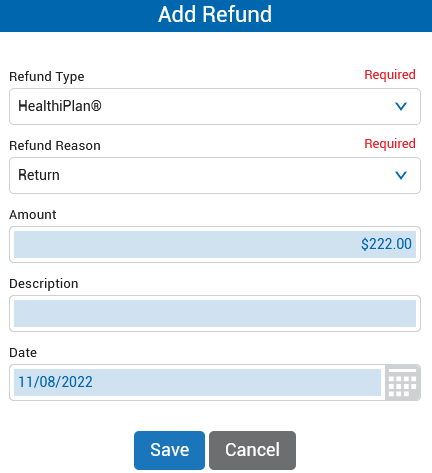
Complete the fields in the Add Refund screen.
-
In the Refund Type field, select HealthiPlan®.
-
Select an option in the Refund Reason field.
-
In the Amount field, enter the value of the return.
Note
This amount can not exceed the amount financed with HealthiPlan®.
-
In the Description field, enter a description.
-
If needed, adjust the Date field.
-
Click Save to close the Add Refund screen and return to the Purchase Summary screen.
-
-
On the Purchase Summary screen, click Save.
Within three business days, the return will be processed, the patient’s account will be credited, and the office account will be debited.
If the patient is retaining the equipment that was returned, create a new invoice with the items and process the new payment on that invoice.